Wednesday 21 May 2014

Self- Evaluation

Self- Evaluation
What actually happened?Evaluate the whole FMP, was it successful? If so, how/why? If not what could you have done to improve the outcome?

Over all I believe that my FMP to be successful as I have met my main aims and targets, which was to create a product that is suitable and will benefit disabled people. As well as producing a product that benefited my disabled mother who suffers from Multiple Sclerosis (MS), to whom was my client. I researched Multiple Sclerosis which is a condition of the central nervous system. In MS, the coating around nerve fibre (called myelin) is damaged, causing a range of symptoms. After researching about MS, I decided to visit both The Science Museum as well as The Natural History Museum. This visit gave me more of a insight about the human body, mainly the parts of the body affected by MS such the central nervous system, the brain and nerve cells.

After conversing with my mother, she highlighted a major problem disabled people face; it was that disabled people find it difficult to clean their house independently. Initially I wanted to create a product that would aid a disabled person when cleaning such as a hoover, giving them more independence and freedom. However, due to many individuals having different disabilities and mobility issues, some people may struggle to use a hoover; others may not have the ability to use it. This led me to look further a field to other problems that disabled people face as well as existing products available for disabled people. Another example of a problem my mother and many other disabled people face, is difficulty in trying to pour hot water out of the kettle to make a hot drink. Due to her lack of balance she needs to hold on to a secure surfaces to support her weight, as well as trying to pour the kettle at a angle focusing on both things at once; this task can be highly dangerous. A jug kettle tipping device are made so that most standard sized jug kettles can fit in it. It consists of a coated wire frame with a central wire cradle which holds the kettle. The cradle is attached to the frame via a pivot, enabling the supported kettle to be tilted to pour out the content.

I visited a hospital in order to see the different equipment available to/for disabled people. However I was not allowed to take pictures as it would me violating patient privacy. I did get to look around at a number of equipment kept in hospitals, such as bed lifts, heart monitors,walking frames, food trays ect. My mother recently had appointment at her hospital Queens Square, to track her progress with the new drug Frampadine she was put on trail, it was to highlight if her speed of walking had improved. However during this appointment I was not allowed to take images of my mother because it was in a public place with other patients. However, I did get to speak to her physiotherapist. She gave me a brief explanation on to why the hospital where giving only a limited number of patients the trail drug, this was due to funds. The NHS has not agreed to fund the drug, therefore it is privately given t patients. She also, explained to me that my mothers walking had improved in speed from 2min in 2013 to 1min 6sec's in 2014, in a 25ft straight lined walk. The reason for attending the appointment was to see how my mother used her crutches and to see how often she put them down. How she placed them down, and how many times it would fall.

After observing my mother I noticed that when she travelled to different places her crutches fell down on many occasions, due to her poor balance she struggles to pick them off the ground. I decided to focus on how to this problem, by creating a product that will allow the crutches to stand alone. A major challenge that I faced was creating a product that would be easy for disabled people to use as well as being a reliable. After interviewing my mother, I found out that she wanted a crutch stand that would not interfere or obstruct her when walking. Also she wanted the crutch stand to be easily assessable when she travelled from place to place, as well as allowing her to put it away when not in use. I decided to research as well as experimented with a number of ways of how to make crutches stand up such as hooks, clips, turning them upside down, putting them in a umbrella stand and existing stands, from that I concluded that each crutch had to have at least three points of contact to the ground just like a tripod stand.

The methods I used to come to come to my final outcome were various different creation that tried to solve different issues that disabled people faced on a daily bases, such as a carrying items and meals up and down the stair. From that I created a stair lift that contained a storage unit below the seat the was able to rotate from left to right. As well as creating a tray that allowed the user to carry meals up and down the stair, that also clipped on and off on the armrest. Also mixing with other disciplines such as the fashion pathway where we created new and different ideas. At first this seemed to be a distraction from my original project, but I soon realised that time out exploring different ideas was needed. Throughout the project I kept a a sketchbook, notebook as well as a blog to highlight my progress through out my project. The sketchbook was helpful to gain and record ideas quickly, as well as experimenting portrayed by a number of sketches and images. The blog was also an effective tool in my FMP, as it helped me reflect on what I had achieved through out the weeks and think about how I could improve my project further.

To take my final idea further I started experimenting with different materials to create my three legs on each crutch resembling a tripod. In which would make the crutches stand alone. When creating a tripod stand made out of wooden square shaped legs, I noticed that it may not stand on all floor surfaces such as carpets and wood floors; because of the bottom of where the legs of the tripod stand meets contact with the floor. I decided to change the shape of my tripod legs from square to circle. This change highlighted that the best shape to use was a circle shape, as the crutch stood more sturdy and freely on tiled floor, carpet and wood floor. However, the material I used which was plastic was to weak to support the metal frame of the crutch; concluding that the material that I should use to build the structure of my tripod stand should be the same material used to make the crutch, which is metal.

After gaining different forms of feedback I found the most effective and helpful to be the one to one sections with my various different tutors. I found these to be very helpful to further develop my ideas. As well as my tutors my peers lead me to look at different existing products and companies, in addition to having interviews with other individuals who have different disabilities. They also got me to think about wider concepts and ideas. Group sits forced me to review and reconsider what I had done so far as well as what to do next within my project.

To create my final product, I decided to attach both crutches together using a clipping device, so that they both would create two points of contact to the ground. As I already had two points of contact all I now needed was one more point of contact. From this I created a extra leg, that imaged a tripod stand. To make it suitable and easier for the disabled user to use, I decided to attach the third leg to the clip that attached the two crutches together. I wanted to make the third leg attachable and detachable making it easier for my mother to use on a daily bases, so I created another clipping device resembling a clamp, which allows the user to pull off easily when not in use. The third leg was made out of three metal pieces that folded into piece when the third leg was no longer needed, imaging a fordable walking stick; making it very useful for the user.


If I had to restart my project from scratch, I would of tried to visit a wider range of sites in which would support my project further. As well as focusing and researching different disabilities, so I would be able to create a product that would fit a number of disabled individual needs. If I had more time and facilities, I would have created mechanism within my end product the crutch stand, that would allow the user to accesses the third leg with just one press of a trigger. The trigger would release the third leg of the crutch, also the trigger allowed the leg to bend back up. Also, I would of made the device more easier to use for disabled people, giving it less functions. From this I have learnt how to manage my time more better, as well as making a product the fit the needs of the clients. When furthering my studies in product and furniture design, I would hope to continue my investigation in to solving problems that disabled people face on a daily places and creating a product that would support their needs.

Monday 19 May 2014

No Limits - Presentation Sheets

Draft


Final Sheets


Hand Grabber/Gripper - Problems and Solutions


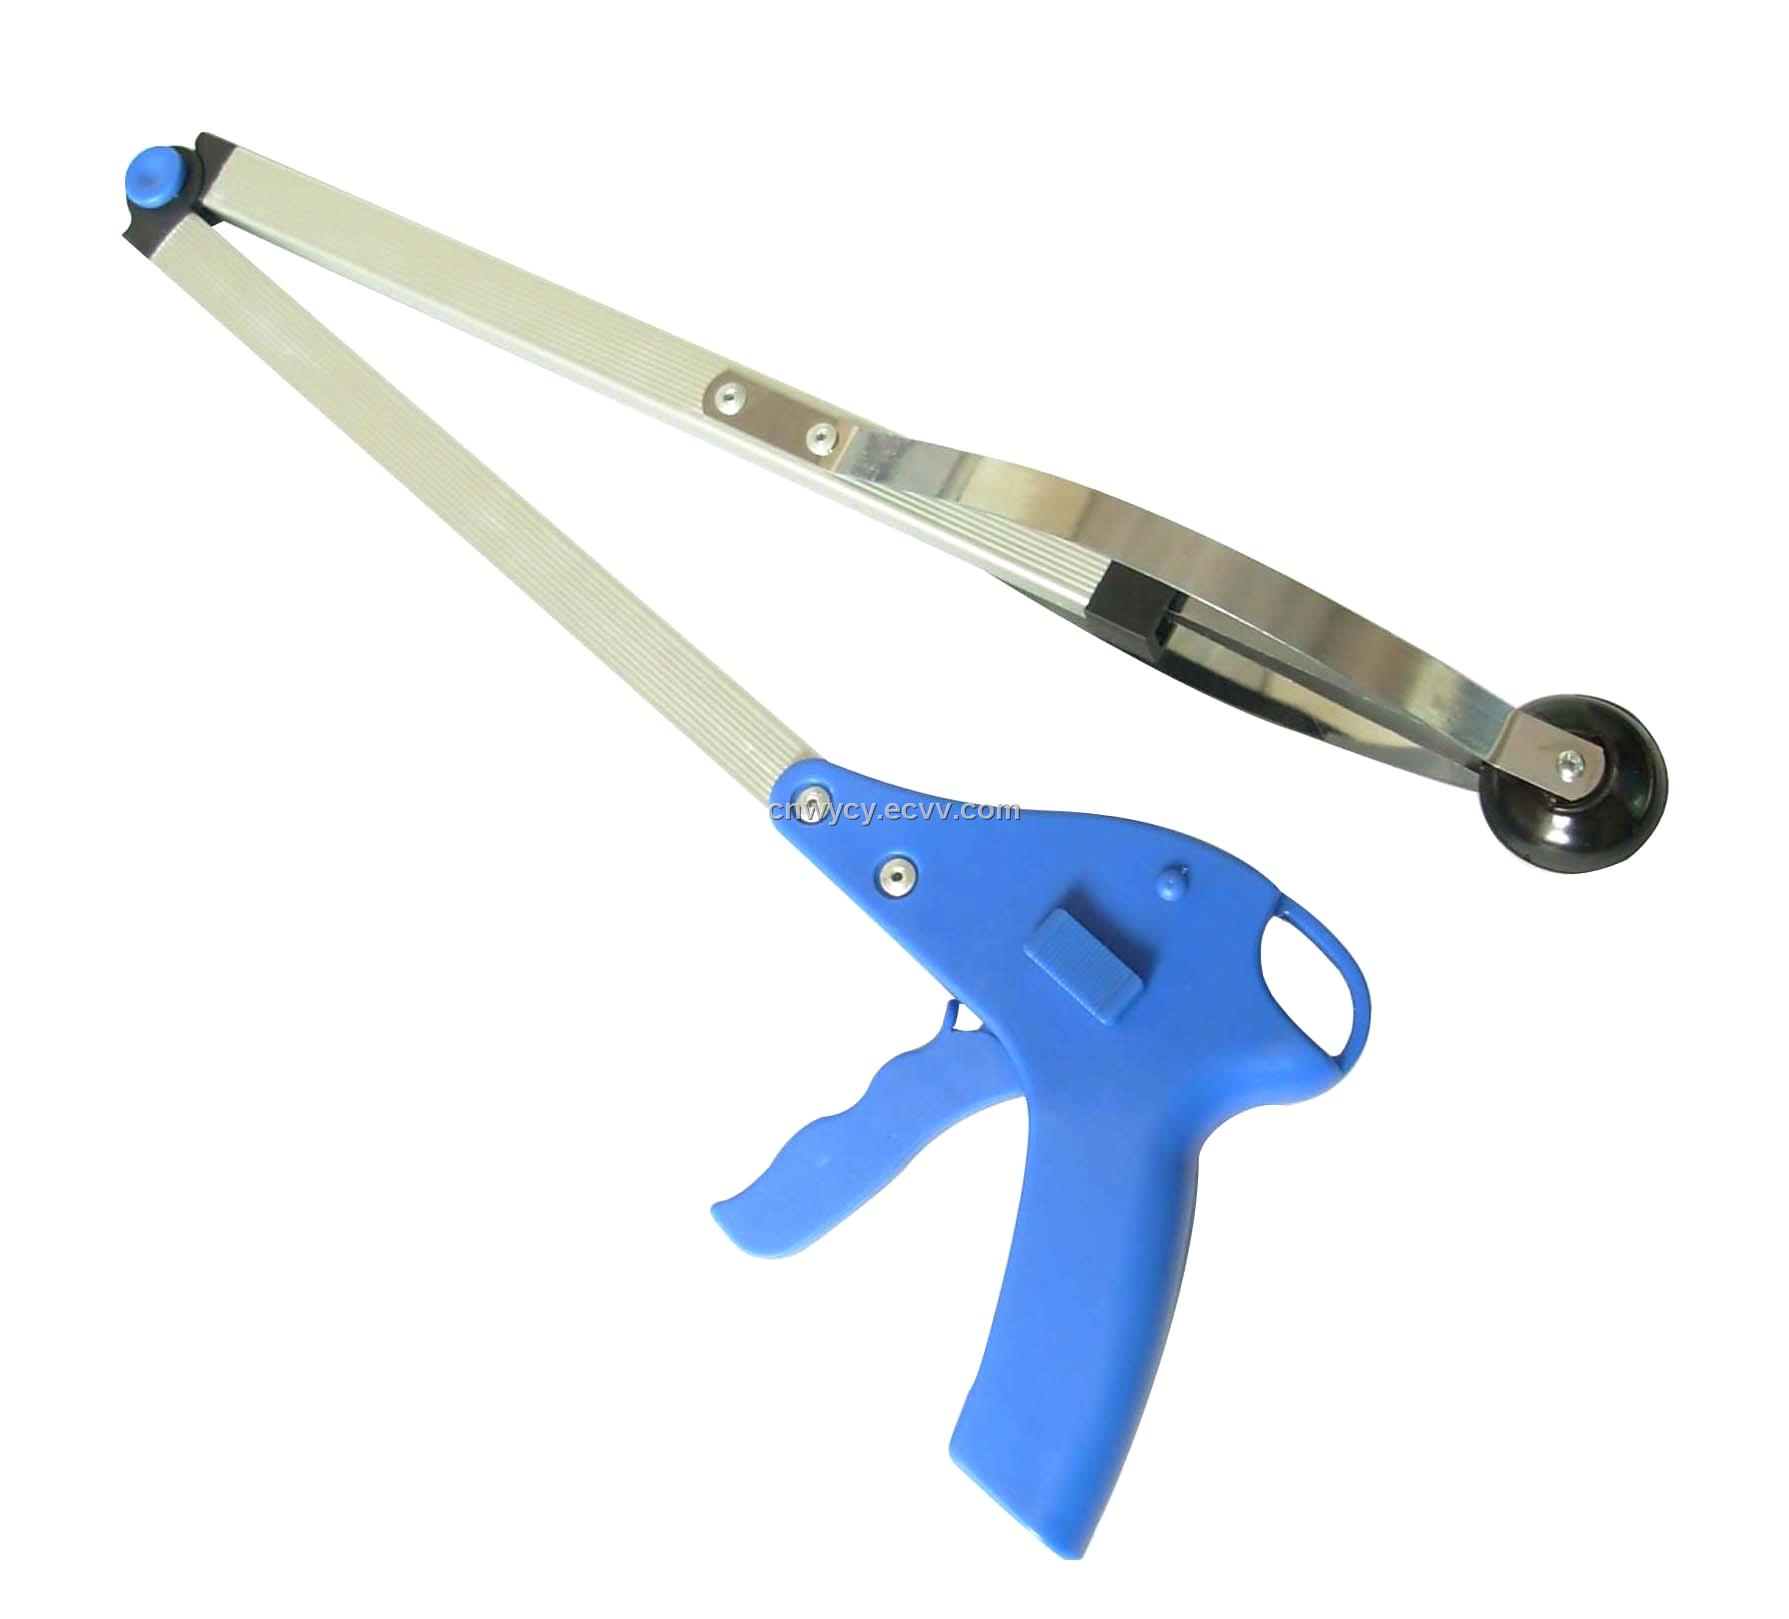
My mother struggles to bend down and get back up in a standing position. So when something falls on the ground she usually calls another person l, including myself to go and. Pick it up. She recently invested in a hand grabber which allows her to pick up items that are out of hand reach. It also allows her to pick up things in a number of different positions, such as sitting as well as standing.


There are a number of different types of hand grabber such as, a lightweight foldable grabber, which can be stored in a suitcase for portable use in travel an vacation.


A rubber groping jaw grabber can extend your reach by 3ft. It is rustproof and has a thin build design. It can be used in both indoors an outdoors and can fit into the thinnest areas.


A 32inch aluminium handicap teacher has a non slip gripping surface and is sturdy enough to pick up light weight objects. Perfect for assisting which socks. It can also extend a reach for someone who is handicap in that area.

Lightweight teacher can pick up anything from a penny to a vegetable can. You can take it to shopping with you to grab cana of the shelves. The handle is a perfect match for most users and is a good reaching device for the handicap.

Aluminium teachers with a magnetic tip and jaw can pick up cand, they work perfectly for picking up lieghtweight metal objects.

Sunday 18 May 2014

Final Idea

After experimenting with a number of materials, shapes and sizes I decided that my final design would be made out of metal and plastic. Also, the leg would image the original leg of the crutch.


I decided to add a further leg (one) to the crutch, so that it was less complex and easier got mother to use. My initial idea is to be able to attach and detach the third leg so you can be used only when needed and put away when not in use.


The third leg will be able to fold k to piece so that it becomes smaller and less bulky. I will also apply to the crutch clip to hold the crutches together.


Using Different Materials To Build My Tripod Leg

Wooden trips stand-
When creating a tripod stand to support the crutches I found that it may not stand on certain floor surfaces. Also, I discovered that it depends in the shape of the bottom of where the legs meets contact with the floor, resulting in me changing shape and material.


Plastic tripod stand-
I decided to change the shape of my tripod legs from square to circle. This change highlights that the best shape to use is a circle shape as the crutch will stand more freely and be more sturdy. However, the material was weak (plastic). Concluding that the materials that I should use to create my final model will be metal for the third leg of my tripod stand, as it is strong and sturdy.


Folding Walking Stick


Adjustable folding walking stick with a 'T' shape wooden handle are light in weight. They are easy to fold away smartly into four easily managed sections for convenient storage when not in use. Made from aluminium shafts attached to a rubber ferrule.


A foldable walking stick will resembled how the third leg of my crutch stand will look. Imaging a tripod, the third leg will be able to attach and detach. Once the third leg is taken off and not in use, the user can detach it from the crutch as well as folding it away so that it does not interfere with their walking.


Features Of My Crutch Stand

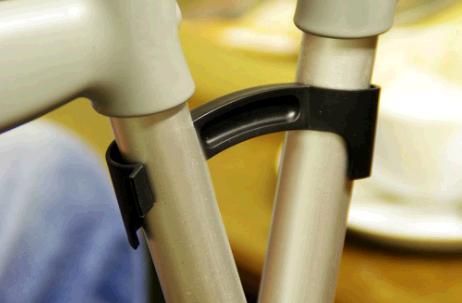
Clip that attached crutches together in a X shape so that it can stand together.


Clip that attaches and allows the crutches to clip/hang from different surfaces.


Clip that attached the third leg, it also enables the third leg to be detached to the crutch leg.


Tripod Leg Ideas

Tripod legs that can move up and down as well as having each legs bled to clip up when not in use.


A tripod with flexible legs allowing the three legs to bend when not in use.


Adding a third leg to the crutch will give it three points of contact to the floor surface, which will enable the crutch to stand. Adding a hook will allow both crutches to hook onto different surfaces. I would initially want the hook to be able to rotate so that it can be hooked onto a surface. Also, I would add the crutch clips on which will attach both crutches together on a X shape making sure they are securely attached.


Crutch Clips


In order for crutches to stand and attach together they need to be clipped together, in most cases they cross as this makes it easier for them to stand together, however it still has the rest against a surface, which is much safer than leaving it on the floor. However, it will require another let in order for it to stand alone.


Bridgit Crutch Holder


This is a strong magnetic force to lock two crutches together at the handle, making them much harder to topple over.

How I Want My Crutch Tripod Leg To Close

Inside a grabber/ gripper -
The handle and grabber parts are made from cast aluminium parts. A cable ribs through the aluminium shaft to prevent snagging the pile during use. The grabber end is fitted with a piece of rubber tubing.

Once the handle is pressed it pulls the trigger back in which pill the elasticated wire which enabled the bottom plastic end to pull and close. This allows the user to pick things up. Once the handle is released the wore snaps back into position.

Umbrella mechanism-

To understand how an umbrella opens and closes, it is necessary to understand its construction. Any umbrella, from huge patio versions to the little emergency umbrellas small enough to fit into a purse, work on the same principle. Waterproof material is stretched over a circular fan of springy metal ribs that attach at the top of the umbrella shaft. These, in turn, are supported by metal stretchers attached to a runner that slides up and down the central shaft. Without the stretchers, the umbrella would not work.


  • The Runner

    While each part of the umbrella is necessary for its operation, the runner is the part that opens and closes it. When the runner is all the way down, the stretchers are folded flat against the shaft and the umbrella is "closed," with the waterproof material and the rwrapped around the shaft. To open the umbrella, the user slides the runner all the way to the top. The stretchers extend, raising the ribs to which they are attached and spreadithmaterial tight over the ribs.


    Hahn
    Hhhcgycgkf
The pop up umbrella works because there is a middle ring connecting to the ribs. When you push down on the ring of the umbrella pops out into a protection cover. The original umbrella worked because the ribs are connected to the middle part of the bre lola and it slides up and down which opens and closed it.

The runner is the part that opens and closed it when the runner is all the way down the stretcher are folded flat against the shaft and the umbrella is closed with the waterproof material and the ribs wrappers around the shaft. To open the umbrella, the user slides the runner all the way to the top. The stretchers extend raiding the ribs to which they are attached and spreading the material tight over the ribs.
  • The Runner

    While each part of the umbrella is necessary for its operation, the runner is the part that opens and closes it. When the runner is all the way down, the stretchers are folded flat against the shaft and the umbrella is "closed," with the waterproof material and the ribs wrapped around the shaft. To open the umbrella, the user slides the runner all the way to the top. The stretchers extend, raising the ribs to which they are attached and spreading the 
    material tight over the ribs.


    The
    The thethe

Tripod Seats

Tripod legs all are the same length they come to two points of contract, both legs and where the crutches cross together. In order for my mothers crutches to stand up without falling over, there needs to be three points of contact on the ground just like a tripod seat. The three legs holds and supports the weight. Each leg of my crutch will have to cross over one another, in which should create a equilateral triangle.


Problem And Solution - Crutch Stand

When conversing and observing my mother, it highlighted a major issue she faces along with many other disabled individuals. When travelling around in and outside of the home she tends to have to balance her crutches on surfaces in order for them to stand up right and balance. However, on many occasions they often fall down. Due to her poor balance she struggles to pick them off the ground. Therefore I am going to come up with a solution that holds them up.


When travelling up and down the stairs my mum has to balance her crutches against the railings and banisters, whilst climbing up or down the stairs. she leaves the crutch against the rails and they tend to fall down.


My mother tries to solve her problems, creating her own solutions such as, using other adaptations to solve other problem, shown in this image. She uses her grab bars to hook and support her crutches whilst climbing the stairs outside.

My Final Idea- Making Crutches Stand

A huge problem my mother and many other disabled people face trying to make their crutches stand up by itself. When my mother goes outside to a number of shops, on the streets in the garden ect, she relies on her crutches to walk around. However, when she trie to do other tasks such as walking up the stairs or standing at a counter to pay for things; she has to rest her crutches on walls, counters ect. It tends to always falls down and due to he poor balance she struggles to pick back up as she can't bend down.
My mother tends to always leave her crutches to rest against the door, walls ect, to do this she has to get it at a angle the insures the it will not fall over.


Using a umbrella stand allows the crutch to stand up and stay into position. However, this can be only used inside as it is to bulky to take outside  well as heavy to carry.


When crutches are turned upside down they have a bigger surface area, which allows it to have more contact with the ground surface so it can balance.


I created a hock made from a hanger. The hock allows users to hang their crutches onto different surfaces. The hock also rotates which allows the users to hang their crutches in different positions.


My Final Idea- Quad Base Walking Stick


Quad base walking stick allows four sturdy legs on the ground rather than just one. It provides expectational stability but the convenience of a one handed walking stick while sitting, a quad cane can stand next to you and will not fall over. When tiding from sitting, be sure not to use the quad cane to pull yourself out of the chair, as it may top over. Stand up forts and then grab the handle.


There are two types of quad canes, wide and narrow base quad canes. Wide case quad canes have a large base where the four legs are attached. This helps provide more support and improved stability while walking. A wide base quad cane is heavier and may be more difficult to maneuver. A narrow base quad cane has a narrow base where the legs are easier to lift and maneuver while walking.

My Final Idea- Different Types Of Crutches

The underarm crutch, sometimes called an axillary crutch, is often the best type of crutch for temporary injuries and disabilities. If an individual’s upper body is strong, then he or she will be able to successfully use underarm crutches for everyday mobility. Not only are these crutches easy to find and replace, they are also good for providing a faster and more adaptable walking speed than other types of crutches.

Another benefit of an underarm crutch is the fact that this type of crutch provides maximum support for the lower body, especially if only one leg is injured. Many other types of crutches are designed for individuals with permanent disabilities or limited motion, and as a result they allow for partial use of both legs for convenience and strength building. Underarm crutches, however, are designed for temporary injuries that require more rest and have a lower ability to tolerate bearing weight.


My Final Idea- Crutches

Crutches of all types require a certain amount of upper body strength for proper use. People often have the misconception that the arms alone hold the body's weight when on crutches. In fact, weight is distributed throughout the entire upper body, and the muscles of the trunk and shoulders do just as much work as the arms. Both underarm crutches and forearm crutches require upper body strength, though forearm crutches require a bit more from the user. If you have limited strength in your core, you may want to consider a knee walker instead.


Learning to walk on crutches can be a real challenge to balance and coordination. Underarm crutches are the most common type of crutch, and can be easier to master at first. However, forearm crutches are proven to give you greater control over your movement. They are often suggested for more active patients, as they allow different gaits for different terrain.
It is vitally important that crutches be properly fitted to the user. You should be able to stand up straight comfortably with a crutch, with your elbow bent between 15 and 30 degrees as your hand rests on the handle. Be sure your crutches are the right size for your body. Improperly fitted crutches can lead to abrasions, muscle pains, and nerve damage. Underarm crutches especially require proper fitting before use.

Where crutches come in contact with the ground, they typically have a rubber, slip-resistant tip. These tips are very important, as they must support your weight and keep the entire crutch balanced as you walk. Larger tips have a wider surface area in contact with the ground, and provide greater stability. Some crutch tips articulate to make walking on your crutches easier and faster. Furthermore, some crutches feature special spring assist technology which allows the crutch to move with the user and adapt to their gait. Whatever type of crutch you use, be sure that the crutch tip is solid and unbroken.

All crutches place a great deal of strain on the wrists and hands. To this end, some crutches feature special handles with extra padding, which can reduce stress and make your walking aid easier to grip. Others offer ergonomic shaping specific to the left or right hand. These offer greater security and comfort to the user. Be sure your crutch has a comfortable handle that will be easy for you to use over a long period of time.

Walking With Crutches

My mother finds it difficult to walk up and down stairs with crutches when leaving the house, therefor she has to try to balance the crutches against a secure surface and walk up the stairs. However, the crutches tends to fall over constantly. As she has a lack of balance she finds it difficult to bend down to pick them back up. This problem also occurs in other public places such as supermarkets, travelling to the car ect. As she uses two crutches as a walking aid, it is very difficult trying to balance both.


Making Models- Cleaning For Disabled People

Model Making- A Storage Stair Lift

Most stairlifts are slimline design. They run on maintenance free rechargeable batteries, working even on a black out. The have a weight capacity of 20 stones (127kg). The arms seats abs footrest all neatly gold away.


If anything is blocking the stair-lift it will come to an immediate that. There are give sensors, three on the footrest, and two on the carriage. The lift can be called up and down the stairs whenever it's needed, making it easy for multiple users to control the stair-lift.

Using the lift is easy as pushing the armrest paddle on the direction of travel. The seats turn and locks on either 45° or 90° position, helping you get in and out of your stair-lift both easily at safely. 


My storage stair lift contains both a tray so that the user can carry meals and drinks as well as other items up and down the stair safely. The tray is attached to the left armrest and can swipe to clip onto the right armrest. The tray is also removable making it easier for the user up clean it. As well as a storage box, attached underneath the seat of the chair. The box can swipe from left to right. It can be used to transport different items up and down the stairs. 


Tuesday 13 May 2014

Modeling Making- A tray for disabled people

When watching my mother eat her meals, I noticed that it is difficult for her to eat food with a tray on her lap. She has to bed forward whilst trying to balance the tray on her lap. I looked at a number of existing trays, and discovered that not many of them was high enough for disabled people, especially those in a wheelchair.

This tray has a moulded handle that clips onto the hand holes in the tray to give a large carrying handle. This allows the tray to be carried by one handle and be well balanced. It's provided with a non-slip mat which prevents items sliding around. 

This tray is a tray base for meal times. It will enable someone to carry and eat their meal safely. The key elements of this design is to create level indicators that gives visual (lights) and audio (beeps) to hint when the tray is tilted too far to the left or right. It has a high contrast edge surface so it can be easily detected. It has microwaveable plates, non slip areas for cutlery and cups. It is washable and dishwater proof. 

This is a adjustable tray ideal for most situations. It is light weight and can  be easily assembled. You can adjust the height and angle. It's easy to fold flat for storage and very easy to clean when needed. 

This enables people to reduce hand function or who are at risk of falls. It's purpose is to move food and drinks safely from kitchens to another room. It consists of sturdy steel frames, two strong plastic shelves which can be easily removed fr cleaning. It contains a raised top to prevent spillage.


The Brain - The Natural History Museum

Different areas of the cortex are responsible for different things

The red area is the sensory areas which connects information from the senses.

The green areas are responsible for ideas and decisions, it is called the association areas.

The blue area is the motor areas which control actions

Inside the outer layer of the brain there are about 10 000 000 000 (10 billion) neurons - nerve cells in the cortex, arranged in networks.


The brain is coordinating and decision making centre of your nervous system. It is made of millions of neurons arranged in complex networks. Each network occupies a different area of the brain. These different areas seem to be many complex interactions between them, and scientists are only just beginning to understand how the brain works.